Showing posts with label epoxy wipe. Show all posts

Saturday, October 03, 2020

A photo description of an old repair - Canard wrinkle

Better than 10 years ago I experienced a hard landing with a passenger aboard.  We landed pretty hard and bounced back into the air. I did a go-around and landed much better the second time. When I got to the gas pump, I discovered a nasty wrinkle in the upper skin. 

In this post I will provide a photographic description of the repair. Click on the photos for a better look. Thanks to Charlie Johnson for the repair advice and C-Rod for the layup and vacuum bagging help.

Initial wrinkle


Drew outline of apparent damage.


Coin tap test reveals extent of the delamination.


Take the weight off of the canard prior to repairs.


Damage to foam revealed.


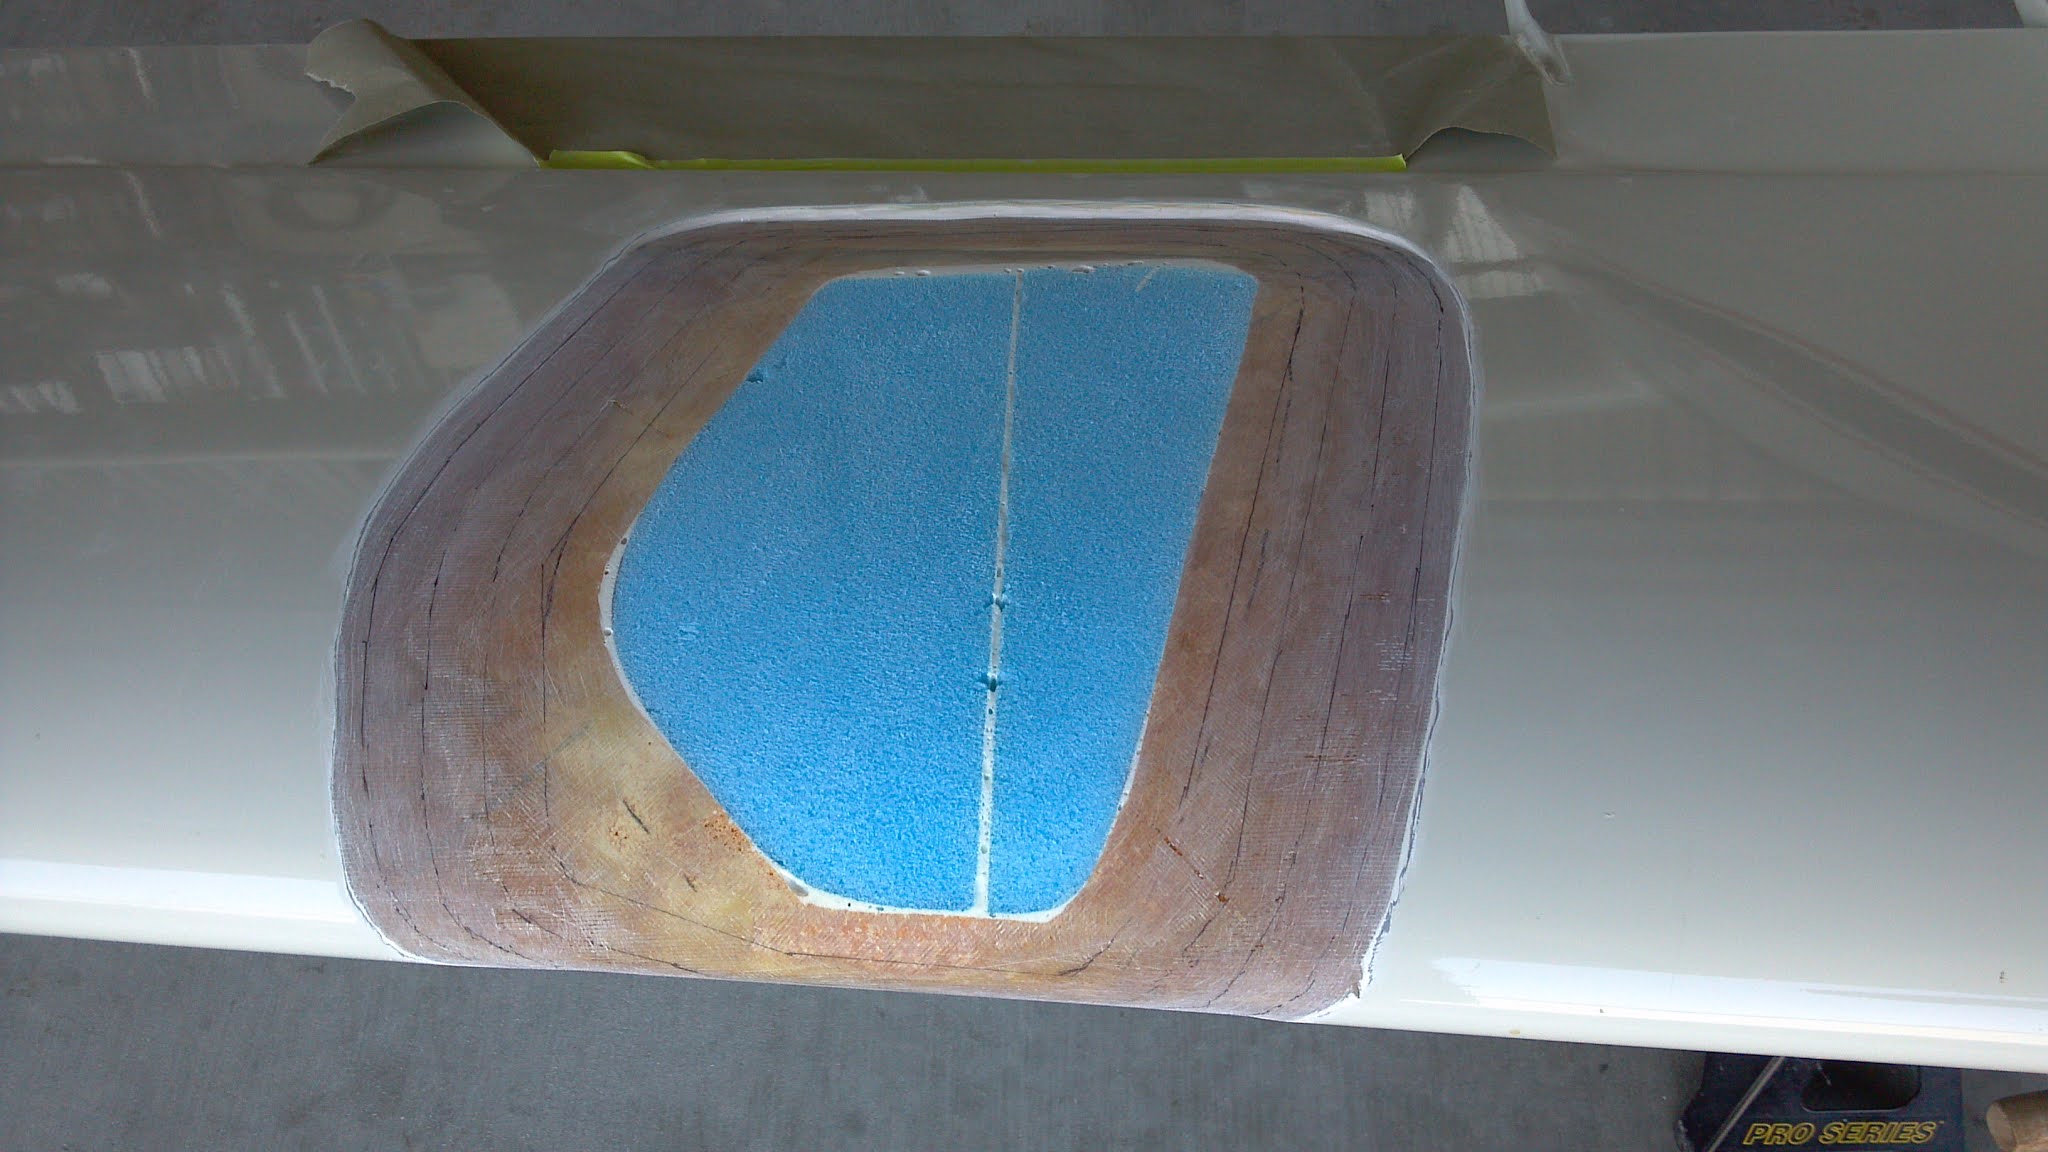
Dug out the foam.


Decided the best way was to go all the way to the lower skin and back to the spar. The spar was  not damaged.


Fit a foam block.


In order to properly fit block all the way down to the skin, it was necessary to split the block front-to-rear, then I could eyeball each side individually.


Lots of wet micro was added to bond the foam in place.  We found the block didn't want to seat, so the use of a vacuum pump was necessary to pull the block all the way down and to eliminate voids.  It worked well.


Get out the Sawzsall for initial carving
.

Getting close to final shape.


Masked off the area to be repaired. 


The existing fiberglass was beveled according to standard composite repair practices, as called out in the education section of the original plans. We trenched the split micro line, since it was a too hard sanding point.


Each line represents how far each repair ply will go. The smallest piece goes on first, then progressively working out to the largest. I forgot exactly how many plies I used. Maybe 5 or 6.


All the fiberglass plies have been added.  Here, the epoxy is still wet.


At the last minute I decided to peel-ply the whole thing.


After the layup has cured for a couple of days, the peel-ply was removed and dry micro applied.


Sanding begins.


After coarse sanding, scratches and pinholes remain.  This will be taken care of by using the epoxy wipe method.


Final sanding completed, ready for epoxy wipe.


After epoxy wipe is complete, all scratches and pinholes are gone!


Prepare for prime, paint and buffing.


Ready for racing!


Wednesday, July 09, 2014

Epoxy Wipe

The cool thing about using the epoxy wipe method of finishing is you don't have to have a perfect surface to start with.  You do have to have your perfectly desired shape, but the scratches and pin holes are no worry.

I use West and microballoons.  First, lay it on thick.


After 3-4 hours it's ready for the "cheese grater" surform file to knock off the high spots. It's best to get started now.  If you wait overnight the filler will be harder to work with. Keep whittling away until you can can just see the glass start to appear, now stop.  Come back tomorrow and start sanding with 36 grit paper. Work on the shape.

When it takes on the desired shape and form, do a last pass with 80 grit paper.  Now, you're done with sanding!


Now it's time for the epoxy wipe.  Use pure West epoxy.  First, used compressed air to thoroughly blow off all the dust out of the pin holes. BTW, some of my "pin holes" are almost 3/8" across!

For the first pass, we used about seven squirts worth.  Squeegee it on, and spread it as thin as you possibly can.  Wait 20-30 minutes and repeat.  The second pass we only used three squirts, for subsequent passes we only needed two. For the underside of the canard, and the inside face of the wheel pants, we gave it four coats.  I may use six for the upper surface.

Click on this photo and you can see how big the pinholes are. They are all perfectly filled.


After we did all this, I installed the brakes. Tomorrow we'll sand the epoxy with 220 grit to ready it for primer. Then the Big Deal - get ready to install the canard!