Saturday, October 24, 2020

Adding a Better Roll Trim

Roll trim is very good to have in the Q-200. Not only do you need to compensate for the weight of a passenger, but roll trim needs change with your speed.  For instance, I notice a big difference when I slow down to landing pattern speeds.

For the longest time, I had the turnbuckle mod on the elevator push rods.  This worked okay, but it was a little hard to adjust, and I found mine seemed to change with the airframe vibration and I'd had to keep on adjusting it.  I was corresponding with Mathew Curcio and he shared his method, and like a true innovator, I copied it.  I really like it.  It's easy to adjust and it and it doesn't change on it's own.  If someone wanted to take it a step further, a guy could install some kind of motor and control it with a switch. 

It's a single rod with the knob fixed to one end and a washer to the other. I installed a couple of phenolic bearing blocks in each bulkhead and also a friction brake, similar to the plan's elevator trim brake.

I've been using setup this for about a year now and I really like it. I'm not going to describe how to make it, the photos should speak for themselves. Click on the photos for an enlarged view. Please post any questions in the Comments.


Saturday, October 03, 2020

A photo description of an old repair - Canard wrinkle

Better than 10 years ago I experienced a hard landing with a passenger aboard.  We landed pretty hard and bounced back into the air. I did a go-around and landed much better the second time. When I got to the gas pump, I discovered a nasty wrinkle in the upper skin. 

In this post I will provide a photographic description of the repair. Click on the photos for a better look. Thanks to Charlie Johnson for the repair advice and C-Rod for the layup and vacuum bagging help.

Initial wrinkle


Drew outline of apparent damage.


Coin tap test reveals extent of the delamination.


Take the weight off of the canard prior to repairs.


Damage to foam revealed.


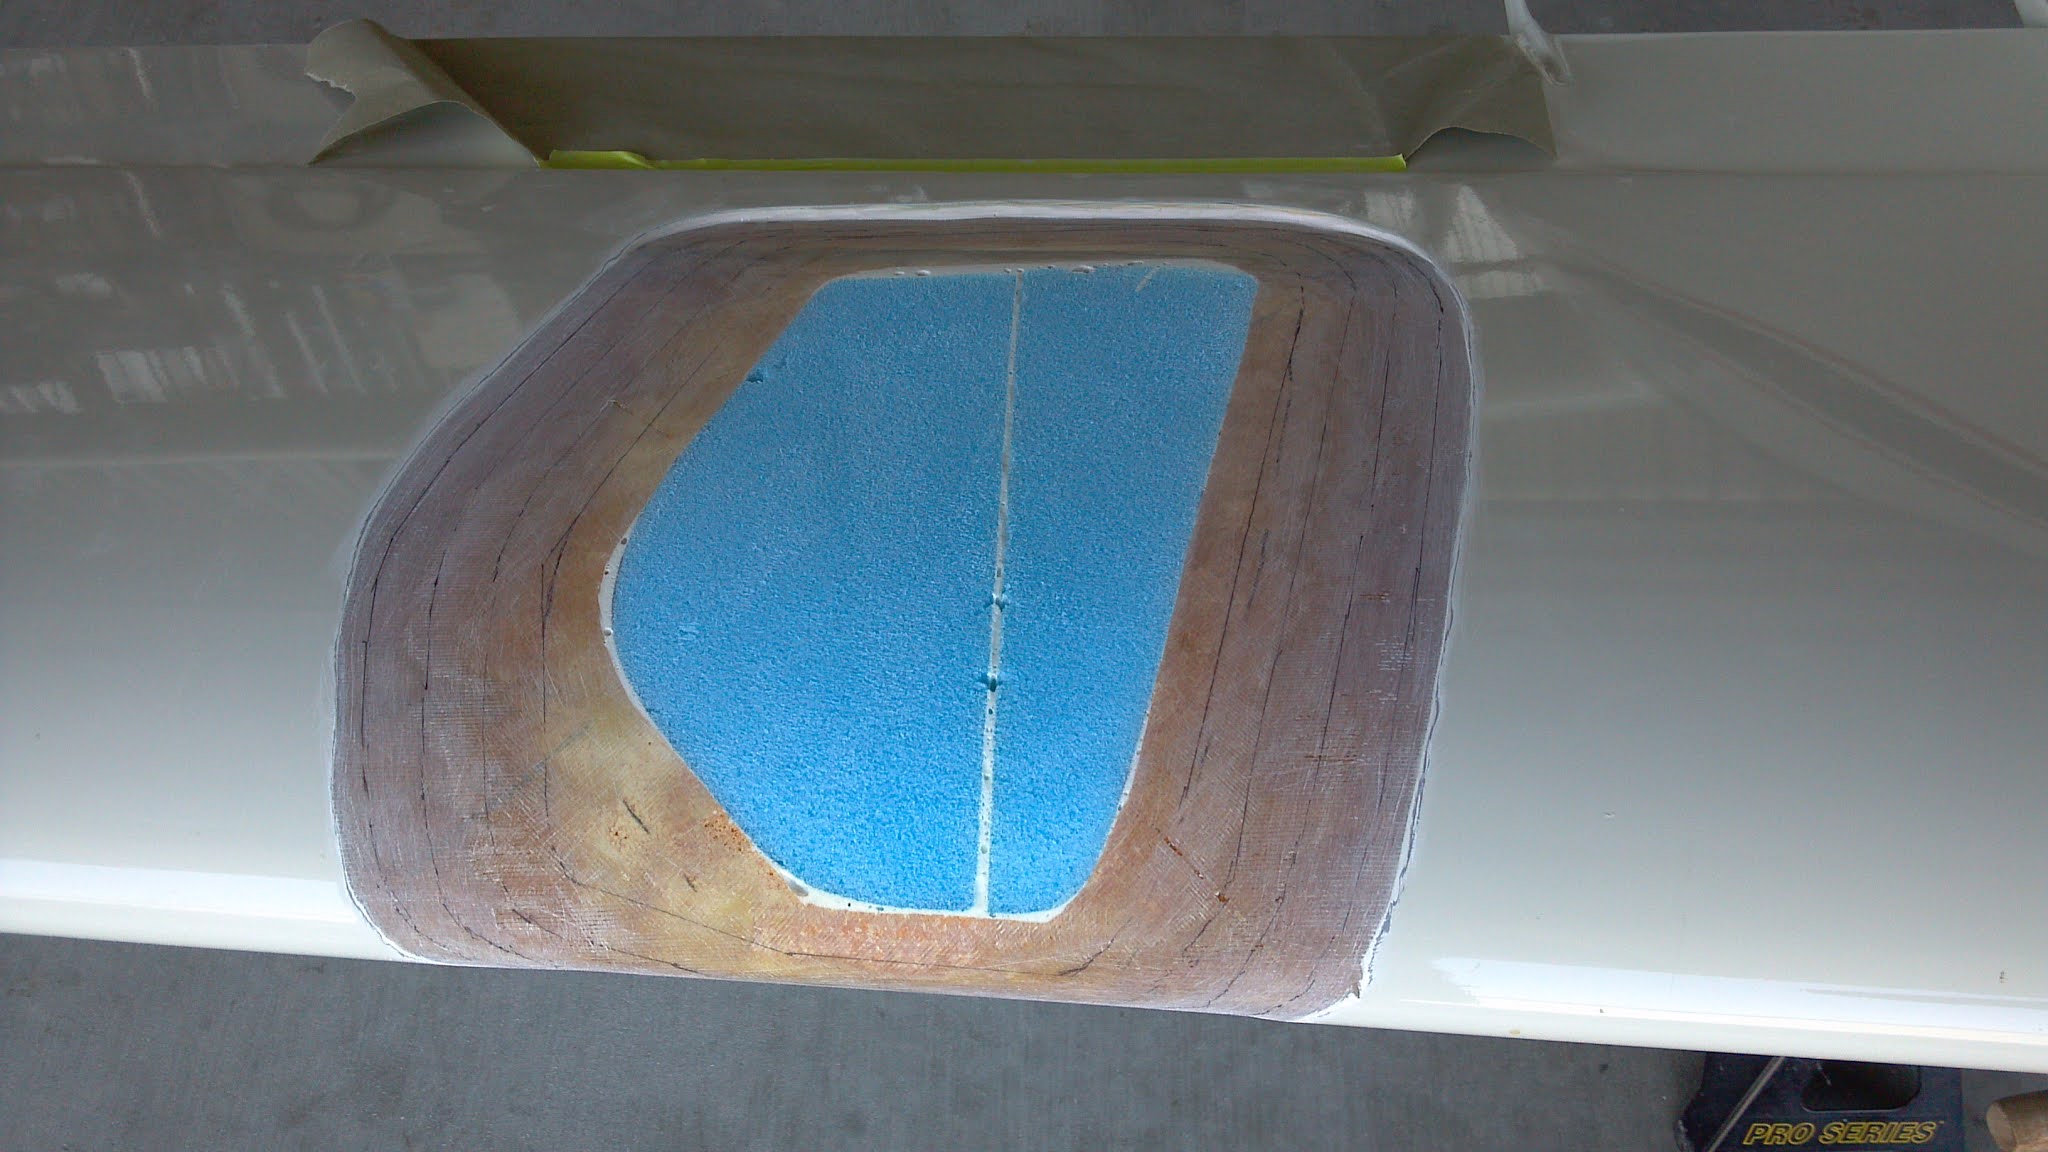
Dug out the foam.


Decided the best way was to go all the way to the lower skin and back to the spar. The spar was  not damaged.


Fit a foam block.


In order to properly fit block all the way down to the skin, it was necessary to split the block front-to-rear, then I could eyeball each side individually.


Lots of wet micro was added to bond the foam in place.  We found the block didn't want to seat, so the use of a vacuum pump was necessary to pull the block all the way down and to eliminate voids.  It worked well.


Get out the Sawzsall for initial carving
.

Getting close to final shape.


Masked off the area to be repaired. 


The existing fiberglass was beveled according to standard composite repair practices, as called out in the education section of the original plans. We trenched the split micro line, since it was a too hard sanding point.


Each line represents how far each repair ply will go. The smallest piece goes on first, then progressively working out to the largest. I forgot exactly how many plies I used. Maybe 5 or 6.


All the fiberglass plies have been added.  Here, the epoxy is still wet.


At the last minute I decided to peel-ply the whole thing.


After the layup has cured for a couple of days, the peel-ply was removed and dry micro applied.


Sanding begins.


After coarse sanding, scratches and pinholes remain.  This will be taken care of by using the epoxy wipe method.


Final sanding completed, ready for epoxy wipe.


After epoxy wipe is complete, all scratches and pinholes are gone!


Prepare for prime, paint and buffing.


Ready for racing!


Saturday, August 31, 2019

Goodbye Old Friend

I decided to clean up some stuff in the hangar, which suffers from clutter creep.  Keven Mitchell at SIU's Aviation Technology department agreed to take a few items off my hands for his classes to use - most likely to learn how to do spot composite repairs. He brought his entire Advanced Composites class over to tour the aircraft and take a few parts.

So, my original canard, along with a few control surfaces, has a new home. I hope they can put it to good use.


Thursday, December 13, 2018

Q-2, Q-200 Fuel Filler Cap

This is kind of an old topic, but since some builders are still in process, I thought it would be useful to post a little bit about the fuel filler cap. In the original plans, they ask you to take a plastic 1 pint camping bottle, cut the top off and use the threads and cap for a fuel filler cap. This is proved to be a very bad idea because if the threads should crack, as they will, you are now introducing low pressure air to your fuel system and you're not able to deliver enough fuel to the carburetor. Unfortunately, the pilot only finds this out when he's about two or three hundred feet off the ground, a hair raising experience.

Several people have come up with different ways to make a fuel cap assembly, but I have been using this very simple one for over 20 years and it is working just great and it is dirt cheap. Run down to your hardware store and get a 1-1/2 by 1-1/2 PVC threaded x slip fitting. Then go to the section of the store that has that little plastic nut that you use under your bathroom sink for the drain slip fitting. Finally, take a piece of .030" aluminum and make a little disc that fits into the slip fitting nut. Now you have all the pieces you need to make a fuel filler cap. I think the pictures should speak for themselves more than me cluttering up the airways with a bunch of verbiage.


A short length of PVC is used to connect the fuel filler to the main fuel tank.


Here in the same installation on my auxiliary fuel tank.

Friday, August 31, 2018

Couple of Air-to-Air photos

I have been wanting to get some new pictures with the latest canard and wheel pants.  I also just installed a uAvionix SkyBeacon ADS-B Out. Thanks to Ken & Amy Bro and their Piper Cherokee.


Sunday, June 10, 2018

2018 Bug Muddy Air Race is complete - sort of.


Check the news stories here.


Thursday, May 17, 2018

The Big Muddy Air Race, coming up June 9, 2018

Come and flex your wings and join us at this year's Big Muddy, down in beautiful Southern Illinois.


Get all the race, and registration information here:  2018 Big Muddy Air Race

Wednesday, January 31, 2018

What is wrong with the plans-built wheel pants?

I was helping a couple of new Q-200 owners out and we were talking about wheel pants.  Here is a video we took, back in 2003, doing some tuft testing. You can see the separation, causing the yard detatch from the surface. 


Here is a shot from the cockpit.


So the goal is to have the wheel pant shaped so the yarn stays flat and that led me to the wheel pants I have today. I kind of used some RV-7 pants as a model, then took some Sawzall artistic license. I think they added 4 miles an hour, maybe more.

I need to do some comparison tufting with the new pants to show the difference for you folks.


Here is how it came together for me and this is how you can modify your existing wheel mants.

Here is the shape I'm shooting for. Right now, the wheelpant foam is the thickness per plans and the brake and axle mounts have been installed.


Using X-40 two-part foam, glue on lots of pieces to build it up.


Here is a Sawzall video, Part 1. There is a part 2 as well.