Saturday, July 09, 2005


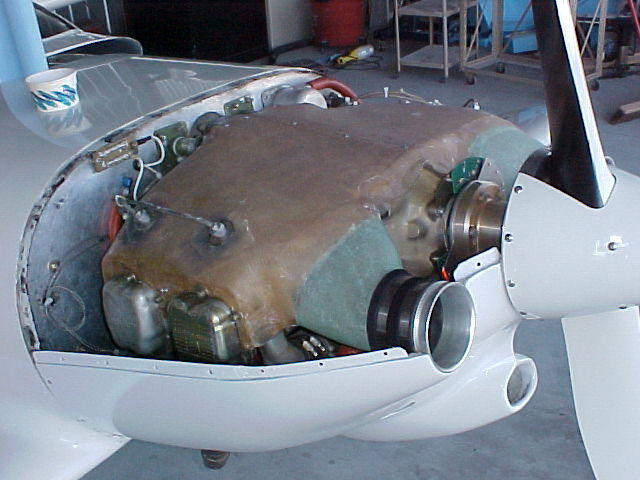
Right after the successful test flight. Everything went smooth. I wound up the flight witha low approach down the runway and was looking at 220 mph on the airspeed indicator. Granted, I was in a shallow decent, but I didn't have the throttle all the way in, either. It took five weeks to modify the cowl. Posted by Picasa

Everything buttoned up! Annual completed, and ready to fly! Posted by Picasa

Alright! Moving right along. My some miricle, the plenum actually lines up with the rings! Someone must have made a mistake, things don't usally work out this well. The black material connecting the inlet ring to the plenum is wetsuit neoprene. Posted by Picasa

Friday, July 08, 2005


The master painter, Rob Hoskins, shows off his handiwork. Rob is a bike and car guy, so he pronounced my close to the pavement wheel clearance a "low rider". Posted by Picasa

Finally! Time for paint! I called my "little" brother, Rob down to help with the finishing touches. What a great help! Posted by Picasa

Saturday, July 02, 2005


Getting ready for paint! Filling work proceeds on the cowling. Posted by Picasa

Again, I skipped a lot of steps - sorry. To make the snouts I simply attached a block of foam onto the existing plenum with 5 min. epoxy. Then I carved to shape. Next, I laid up four layers of BID. To keep the BID from permanantly attaching to the foam and creating a lot of hard micro bumps, I first used a fairly dry micro on the foam - but with no hardener. After the epoxy fully cured I poured about 1/2 cup of MEK onto the foam. It melted the foam very well and I got a fairly smooth internal surface because I used the micro without hardener. Posted by Picasa