Friday, May 02, 2008

Time to Start Filling and Sanding


To keep this post short and simple, let's just say I used the advice from George Sychrovsky and Wayne Hicks. Be sure you read those two links if you are going to finish your plane. The Prime Directive is, "ONLY FILL ONCE"!!! If you and filling, sanding, filling and sanding, you are doing it wrong. I used their method this time around and am very glad I did. However, I did not go the black primer route.

I used West System, which is non-structural for aircraft, and glass microballoons. First, I filled low areas using the fast hardener. Then I started mixing and mixing and spreading and spreading. I really lathered it on. I bet some places were at least 3/8" think. But again, the idea is to lay it on only once and sand down to the low spots. It took me about 1-1/2 hours per wing panel, doing one at a time.


After about 5 hours of cure time I can go at it with a Stanley Surform file to knock down the high spots.


I used two-foot sanding boards with 36 grit paper. I use the 3M stuff that already has the sticky back. Per George's recommendation, I made the boards from laminated bookshelf boards I got from Lowes, then attached a piece of angle aluminium on the back. Before got really into it, I took a pencil and really marked up the surface. This helped me gauge how much I had sanded and identified the low spots that I would sand down to.

Sand, sand, sand for a couple of hours. Note the pile of dust. Really though, it's not that hard. I just say to myself, "I am going to work on the plane from 9:00 to noon, and when it's time for lunch I will have a sanded wing panel"! I bet I sanded off over 80% of the micro that I applied.

When it looks good with the 36 grit paper, I switched to 80. Just a few minutes with the 80 and that's it! At this point there are all sorts of awful holes, crevices, and scratches. Previous methods would have had us filling and refilling. Yeaucch.

Next, I do the epoxy wipe. Mix up a full cup of West and squeegee it on. I just apply enough to make it wet, then try and squeegee it all off. I am not building coats, I am filling the imperfections. I repeat this every hour until I have applied 4-6 coats.


Next say put some 120 grit paper on the sanding boards, make a few passes and I'm ready for primer! I love it!

Wing Tips


Time to install wing tips. First I glue on some foam using two-part expanding foam. Next I take out my trusty Milwaukee Sawsall and start trimming until all that is left what looks like a wing tip.

A little sanding and it's looking good.


Bond in some plates to hold the strobe lights, glass it all and we're done.

Fix an Oops!


After the wing was mounted, I found there was a slight upward bow in the outermost portion. I agonized about it for a long time, but was fortunate enough to talk about it to Mike Bergen. Turns out he had the same condition and that it was easy to fix.

I started by marking the upper wing, then simply slit it with my Dremel. Using a hack saw blade, I scored the foam all the way through to the lower skin.

Next, I stuck a couple of tongue depressors in the slit to open it enough to take the bow out of the trailing edge. It wasn't much!

I filled the wound with TAP 30, expanding foam from Aircraft Spruce. By the way, DO NOT use the two part foam from Wicks. It is really lousy, weak and crumbly.


Made a standard BID repair over the foam and the job's all done!

Tuesday, March 11, 2008

Wheel pant skirts

A long time ago, the Quickie Aircraft Company used to race the prototype Q-2. One of the things they used was removable wheel pant skirts.

When we had my plane flipped over, C-Rod came over and remarked that I was probably getting a lot of drag from the underside of the wheel pant, and when you look at it, I'm sure he is right.


This was the only time I could do anything about it, so we I dug in. I figured I could make some kind of cover, but the trick would be holding it in place. I finally decided to put slot in the wheel pant to hold the aft end of the skirt, then I would use a single fastener for the front.

First, I make a crude template from stiff paper. Then I made up a couple of flay lay-ups using two layers of carbon fiber.


The slot was cut into the pant and I stuffed flox into it to stiffen it up. While the flox was still wet, I stuck in a piece of aluminum covered with clear tape (black arrow). That would form the slit in the slot.

I needed a way to stiffen the skirts, so I made some vertical stiffeners by laying up strips on the inside of the wheel pant. This would get me a general shape. The stiffeners were attached to the skirt, in situ, then finally the front attach point was added.


My thoughts are to use the skirts only while racing and to be able to remove them without having to jack up the plane. However, I will probably have to jack up the plane to insert them.

I hope this gains me a knot or two.

Sunday, March 09, 2008

Canard Fillets


One of the aerodynamic clean-ups on my list was the fillets where the canard comes up to the fuselage. I wanted to smooth out the airflow around this area, and I also wanted to cover up the slot gap that allows you to remove the canard.

After the plane was flipped over, I ground down the paint in the fillet area and cut off the old fillets. The first photo shows a paper mock-up, taped in place. You can click on a photo to see a larger image.

Then, using expanding foam (second photo), I built up the area. I use foil, cardboard, paper, duct tape; just anything that can keep the foram in place while it's expanding.

Time for my trusty Milwaukee Sawzall for the initial carving. I also use hacksaw blades and sander blocks. I just kind of keep on trimming until it looks good.

Get some glass on it and we're good to go. I also made aluminum cover plates to cover the slots.


Installing the New Wing


Since I always had to fly around with the ailerons reflexed up about 3/8", I decided to change straighten it out and raise the trailing edge of the new wing by about 1/8". Using digital levels, this translated to lowering the L.E. by about 0.5 degree. There is a lot of "by gosh and by golly" engineering here.


I made a template and bondoed it onto the old wing and brought the airframe to a position where the top of the template was level. (The old WL15 marks are long gone). When it was time to insert the new wing, I used the same reference, raising the T.E. 0.5 degree. I won't know until the first flight it this was a good thing to do, or not.

Note added 11/08/2011: It turned out just fine.

Digging the hole deeper


This year, for Christmas, my wife offered me either a new interior or a new canopy. I have been flying around for the last five years or so with a small crack in the canopy (the left wheelpant did it, but that's another story) and she thought it looked tacky to have the crack covered up by a Rich's Incredible Pyro sticker.

I couldn't very well get a new interior, and ruin my reputation, so I got hold of Todd's Canopies in Florida, and he happened to have exactly what I needed, on the shelf. When it arrived, I took out the old canopy and ground down most of the glass, leaving this flimsy frame. Installation has not yet started, but I thought I'd show you what I have to begin with.

Saturday, March 08, 2008

Electronic Fuel Injection not recommended for Qs

Klaus Savier runs the AirVenture Cup race at about 254 mph, with his O-200! This year Klaus gave a forum at Oshkosh. He was telling the audience how great fuel injection was and the great efficiency that he got out of the engine. He said when he slows down to 150 kts. he is approaching 100 mpg!

Of course I asked Klaus if he was going to make the EFI available as a product. He said that he was doing fine with the electronic ignition systems and didn't want to incur the liability of selling systems that have 40 psi fuel in the engine compartment.

Naturally, I was quite disappointed and naturally, I decided to make my own.

Having gotten into this process of having an all electric airplane and then having an electronic fuel injection, I better understand Klaus' concern. First, you need a bullet proof electrical system. Not just for today, but for the next umpteen years your creation will be in the air.

Then there is the fuel system. You have to have a great throttle body. You have to have a high pressure fuel pump and a back-up. You have lots of extra plumbing. You have fuel injectors, you have lots of extra fuel line connections in the engine compartment. You have a fuel regulator. You have to have a better fuel filtration system. You have to have a bullet-proof electronic fuel controller and sensors. There are other sensors, too.

Then there is the electrical system. This system will draw five to seven amps in normal flight. That means five to seven amps to keep it in the air. Below that and the fan stops.

Personally, I feel like I am on the edge with this project. I want to do it, and I can do it, and I will do it, but it is not easy and there are a lot of engineering challenges.

For all of these reasons I would STRONGLY urge the first-time Q-200 builder to not to attempt an EFI system. Use the good old MA3-SPA carb. Use a single mag with an electronic system and work into it slowly. Learn about the foibles of your electrical system. Learn how to fly the plane. After you get competent, then start fooling with it - but please, not before your first flight.

Electronic Fuel Injection & Ignition

A couple of years ago, Lynn French blazed new territory and installed an EFI system in his Tri-Q. From the research and safety point of view, Lynn did it right. He kept his carburetor and installed the fuel injection on top of it. I decided to build on his work and jump in wit both feet.

Lots and lots of parts were ordered. First I placed the order for the RWS EC2 engine controller. I'm not going to list everything here, but there is A LOT to pull together.

With the help of Jeff Sell, in Wisconsin I put together the new intake tubes with the injector bosses welded in.


This shows the injector and the fuel connection.


Lynn had simply used the carburetor as the TB. I found one from an English racing supplier, Jenvy. This TB also has a port for an injector. The EFI controller has redundant A/B systems. My primary system will use the injectors mounted on the intake tubes. The back-up system will use the single injector mounted on the throttle body itself.


The next item was the trigger wheel which tells the controller the crankshaft position. Lynn provided a source, I would up getting a smalle, 6" diameter wheen and had it machined. The wheel was about 1/8" thick, so I had the machinist reduce the thickness in the middle, to preserve the amount of grip between the prop lugs and the propeller.


I also had to source high pressure fuel pumps, hoses, injectors, and a bunch of other stuff. This will be challenging and fun.

I am still waiting for the controller from RWS.


The Sawzall Massacree


Let the pictures speak for themselves.

What was wrong with the old wing?

As I mentioned, I just happened to have a spare Q-2 wing laying around. There were a couple of things about the old wing that I didn't like. Foremost, was the use of the wrong filler that I used 22+ years ago. The Quickie dealer I shared a hangar with, urged me to use this stuff that he used and he purchased from a local hobby shop. (Obviously, I didn't know squat back then). He said if I mixed this stuff with microballoons it would set up in an hour and I could start working it the same day, instead of waiting a day or two using Safe-t-poxy. Seemed to make sense at the time.

I barely knew the difference, but this stuff was a polyester resin. It seemed to work well for finishing, but my problems didn't surface until a few years after I was flying. It seems the polyester soaked through pinholes in the wing's surface and made it's way to the foam. I believe it actually cavitated the foam and over years left a series of little depressions in the thing. Mostly on the underside. One year I drilled small holes in the depressions and injected wet micro, but that was mostly a cosmetic fix.


Composites are really strong, but that always nagged at me. Then there was another mysterious problem. Just outboard of the fuselage on the upper surface, there was a mysterious indentation in the wing, about the size of your hand. The casual observer would never see it, but I knew it was there, but didn't know why.

Was it because of the polyester? Had it been overstressed? Did it happen when I once plopped a little girl on the wing for a photo op? I don't know.

So, I elected to make a new, stronger wing. I used the same shape, but I made two changes. First, I added one more uni spar cap on the top and the bottom. I adjusted all the layers to suit. I also terminated each spar cap with a "point", rather than being squared off, per plans. This should avoid the composite equivalent of stress risers.


The last problem was with the rigging of the wing itself. Early in my flight testing, I had a mechanical failure of the rudder system and went off the runway, and the plane flipped over and broke the wing. A new wing was build and installed, but I think the angle of incidence was incorrect, since I always had to fly around with the ailerons reflexed up about 3/8". So, replacing the wing would allow me to try and correct this at the same time.

Instrument Panel

The big commitment started with removing all of my steam gauges and the instrument panel. I had parts coming in like crazy and, at the same time, getting rid of stuff on Ebay. I ordered a piece of aluminium and started laying out the panel.

I am jumping in with both feet and leaving little room for error. The panel will consist of:
  • Dynon FightDeck D-180
  • Panel mount for my Garmin GPS196
  • New ICOM radio
  • Transponder
  • Hobbs meter
  • Switches
That's it. No back-up altimeter/airspeed. No compass.

To pull this off, I'm going to have a great electrical system so I started by ordering a 30 amp alternator from B&C.

I then cut out the panel, installed the brackets and dropped it off to be powder coated. I would rate the powder coat job as being "fair" - no great shakes. But for now, I'll set it aside as I get into the major work.


I'm at it again....


At last year's Tandem Wing fly-in Spud and Doug conspired and put a price on my head. They each offered to put up $100 to anyone, in the tandem wing class, who could post a faster performance run than I could.

What did I do to deserve that?

Anyhoo, life's circumstances have made it possible to fool around with the plane for a year, so I decided I might as well jump in with both feet. Here is the first go-around of year's project list:
  • Install new, stronger, rear wing. With the help of Paul & Roy Fisher and Charley Rodriguez I had made a new wing about three years ago and never got around to installing it.
  • Install electronic fuel injection and ignition, treading the trail that Lynn French blazed.
  • Build a new instrument panel, featuring a Dynon FlightDECK D-180
  • Aerodynamic clean-up including; new canard fillets, clean-up wheel pants, lengthen engine cowling 2 inches, low profile oil sump, and other items such as fixing canopy gaps.
For Christmas, Sandy offered me either a new interior or a new canopy (the old one had a crack in it). I took the canopy.

So, where was all this work to be done, here in the southern Illinois winter? Out of the blue, John Cotter offered my a small plot of real estate in the Southern Illinois University's Aviation Technologies hangar! The best of all worlds; heat, light, and daily trash removal.

So, a couple of weeks before Christmas I moved into my winter home and pulled out the Sawzall.

This is really going to be a lot of work, but it is all fun. I think Spud & Doug ought to offer their bounty to me.

Sunday, February 17, 2008

Dual Brakes

After about 1,1o0 hours I installed dual brakes. It was easy and I wish I had done it 1,100 hours ago. Here's a couple of photos how I did it.


Wednesday, September 26, 2007

Flying the 2007 AirVenture Cup race

Here is a little report about my performance in this year’s AirVenture Cup race, from Dayton to just south of Oshkosh. This year’s race was cut down to 435 miles. The race website is www.airventurecup.com

We had 52 planes in the race and five in the Sprint class (displacement of O-240 cu. in. or less). Two planes were Vari-Ezes that pretty well trounced me last year. There were also two planes I beat last year; a rotary powered Velocity 173RG (74 cu. in. displacement) and a Lancair 235.

Up to the point of engine start, this year’s race was routine – if you can ever call a race “routine”. I watched the unlimited guys take off before I started up – that Nemesis NXT is really an awesome machine. I got in the big long line for departure then taxied down toward the starting line, right behind Gil Hutchison in his fast Vari-Eze. When I got to the departure staging I did a very quick run-up and found a very rough left mag. Actually, the left “mag” is my LSE electronic ignition.

It was extremely rough, complete with backfires. So I ran it up a little higher hoping it would be a fouled plug that I could clear. At something like 1,800 RPM it was still backfiring, so I indicated to the guy controlling the runway thumbs-down, that I would not be going anywhere right now. He cleared me out to the runway, and when Gil took off, I just taxied the full length behind him. I went back to the hangar and shut it down. In my haste, I forgot to try and diagnose the problem by looking at look at my exhaust temp and cylinder head temp gauges. At this point I didn’t know if it was the ignition system, a bad plug, bad wire, or what.

I immediately pulled the cowling and the lower plugs and one of them looked pretty dirty. I was going to try to clean them, but the mechanic in the shop wasn’t able to help me and it wasn’t my shop, so I couldn’t help myself. So someone volunteered and we ran down to the Pepboys automotive store to find replacement plugs. True to life in retail stores, there wasn’t anyone behind the counter. (C’mon, I’m supposed to be in an air race RIGHT NOW!) Finally, a guy ambled over. He couldn’t find exact replacement plugs, so I took whatever he had that would fit.

We went back to the hangar and I put the plugs in. I was just about to get in the plane when Eric Whyte announced that the first planes had already arrived at the finish line south of Fond Du Lac.

I fired it up. Ran fine. No problem. Taxied out. By this time, all the race planes were long gone. Instead of being behind race planes waiting for takeoff, I was behind a Mooney and a Piper Cherokee. It kind of changed the tenor of the whole thing.

I finally got in the air and everything was fine. I tuned the discrete race frequency and, of course, nobody was on because anybody still in the air was hundreds of miles away.

The engine was smooth and my speeds were good. Most times I was seeing 185 knots for ground speed and at one point I was showing 192 knots. Most of the time I flew about 1,000 feet AGL.

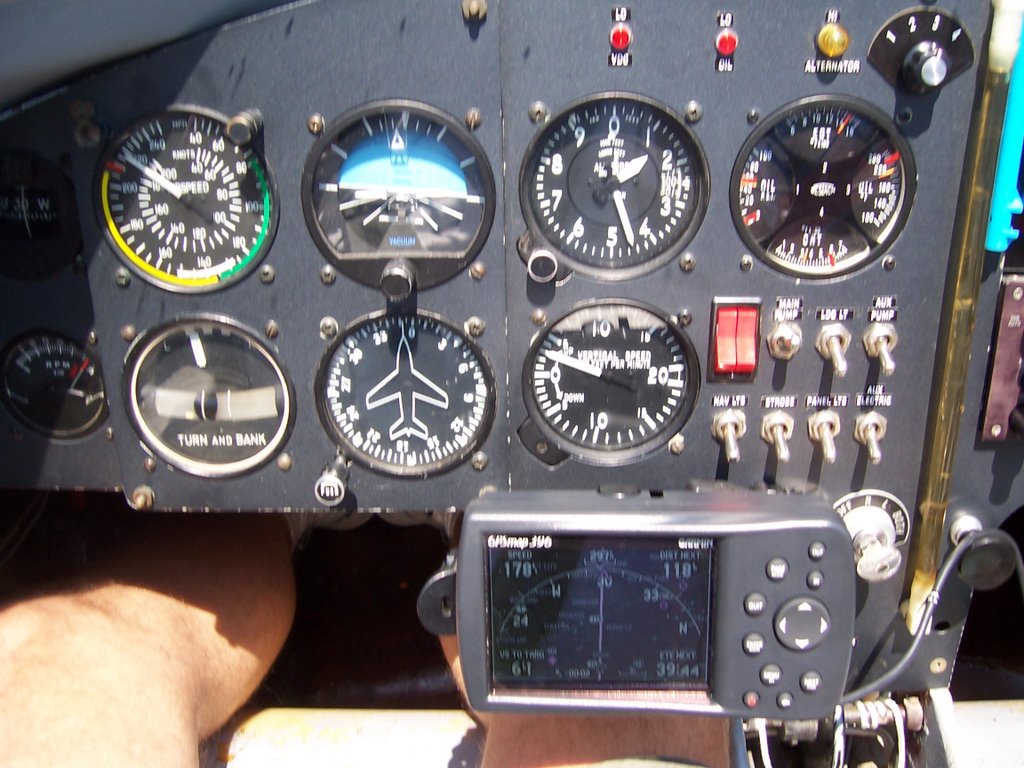
As I approached the Kankakee airport, the first checkpoint, I was starting to lose some RPMs and gain some roughness. I had been running at 3,050 but it was dropping to 2,850 or so. In addition, there was some vibration and my oil temperature was going way up. I didn’t have any idea what was happening, but noticed that if I throttled back a half inch or so it would run a little better.

I made the designated low pass Kankakee but then I pulled up and circled once to try and determine if it was safe to continue.

I called the race crew on the ground at Kankakee, and told them I was circling once and may have trouble. They acknowledged the call but then I told them I would continue.

As I headed out, I was doing some experimenting and checking the EGT/CHT. In addition to my oil temperatures going up, the CHT on cylinder number three was over 500 degrees! Again, I found by throttling back a little bit, I could bring it down to the normal range around 325 degrees.

Somewhere along the line I figured out what was happening. The new plugs that I bought were too hot, they were the wrong heat range, and I was getting pre-ignition in cylinder number three. Pre-ignition occurs when there are parts glowing red hot in the combustion chamber and the cylinder acts like a diesel engine. Not good.

But, throttling back brought all the temps in line so I flew the rest of the race.

My final average speed was timed at 205.25 mph, my personal best, which was only 0.13 mph faster than the guy that took fourth place! I only beat him by 5 seconds! (If I factor in a two minute loss for the circling and throttle back for half the race, I’m pretty sure I could have registered around 208.)

As I expected, I was soundly tromped by the two modified Vari-Ezes. Second place went to Gil Hutchison at 231.07 and Klaus Savier took first, at a screaming 254.89 mph! By the way, the fastest Unlimited class aircraft, the Nemesis NXT completed the course in 1:15:07 at 337.26 mph!

When I finally got to Oshkosh I installed the correct plugs and Terry Crouch did a borescope inspection of the pistons. The race is fun, but it does test and stress everything you and your plane have done. Whew!

Looks like I have some more speed work to do. See you there, next year!

Aircraft

Pilot

Time

Speed – mph

Vari-Eze

Klaus Savier

1:39:27

254.89

Vari-Eze

Gil Hutchison

1:49:42

231.07

Quickie Q-200

Sam Hoskins

2:03:30

205.25

Velocity 173RG

Scott Jones

2:03:35

205.12

Lancair 235

Dennis Collins

2:03:51

204.67

Wednesday, July 18, 2007

2007 AirVenture Cup Race & Oshkosh

I will be participating in this year's AirVenture Cup race - again and
making my 19th trip to the Oshkosh convention. I depart for Dayton
this coming Saturday, then do the race on Sunday, July 22. The race
is slightly shorter this year and I hear they are making some
accommodations for fuel stops. The race link is www.airventurecup.com

Here is this year's lineup in the Sprint class (O-240 cu. in or less).

22 Quickie Q-200 Sam Hoskins
44 Velocity Scott Jones/ Bill Schiferl (74 cu. in. Mazda rotary?)
47 Vari-EZE Greg Shaskan / David Shaskan
64 Sportsman Sonerai I Jeff Lange (VW engine?)
90 Lancair 235 Dennis Collins / Kathyrn Collins
111 Vari-EZE Klaus Savier

Again, I am dismayed to see Klaus enter again. I was thinking maybe
we could have a leg-breaking event for him the night before the race -
otherwise he will surely wax me. Last year he posted a speed of 241
mph!

The #64 Sonerai is a new entrant and an unknown adversary. I know
some of that class of aircraft hasn't participated before because of
the long distances and the fuel requirements. (At wide open throttle,
my O-200 uses about 10 gallons per hour.) Now, with an unknown
allowance for a fuel stop I don't know what to expect.

I'm also not familiar with the #47 Vari-Eze, so I don't know if it's a
fast one or not. If it is a stock Vari-Eze it should be not problem,
but if he is a speed freak it could be trouble. I did beat #90
Lancair 235 last year by 5 mph and #44 Velocity by 16 mph. As long
as my engine hasn't lost too much poop over the last couple years, and
everything hold together, I can still hope for a second or third
place.

FYI, my past race speeds and standings were (in mph):

2002 172.08 Second out of 3
2003 182.53 Fourth out of 12
2004 201.12 First out of 6
2005 200.31 Second out of 5
2006 202.03 Third out of 7

My annual condition inspection took a little longer this year, I had
to pull a cylinder to heli-coil one of the cylinder studs. That was a
real pain and far more expensive than it should have been. But I flew
it a couple times this week and all seems to be well.

So that's about it. They usually post the results at the EAA
AirVenture web site a day or so after the race.

See you at the Big Show!

Friday, September 15, 2006

How 'bout that wheel & rudder? My strong opinions.

We're talking Q-2/Q-200 taildraggers here. Nose gears need read no further. 

On the Q-List there are lots of opinions about the need for a bigger rudder or fancy tail wheel and bracket. Some taildragger expert recently said something to the effect that "the plane needs a bigger rudder because the fuselage blanks out the vertical stab when the wheel is on the ground". Gee Whiz - I didn't know that. I guess I didn't know what I was missing. 

I had to buzz down to Cape Girardeau yesterday and thought I'd try it out. On landing I tried using the tail wheel and rudder. Nope - nothing missing when I'm decelerating. I have full authority all the way down from touchdown 80 mph down to zero mph. 

 Alright, let's try a "slow" takeoff. I tried pushing the throttle in gradually, to see if there was a range where the rudder, tailwheel was ineffective. Nope again - full authority throughout the entire range. So here's the deal, here's my humble opinions. Print this list out and paste it on your refrigerator door. Either that, or use it for TP. 

1. The stock rudder does not need to be modified. 
2. The stock tail wheel and bracket does just fine. 
3. The stock tail spring needs to be beefed up. The stock ones break. (There are lots of ways to accomplish this fix. I have had very good results from Peter Harris's fiberglass spring). 
4. You must align the wheel axles so if you peer through one, while the full weight of the plane is loaded, that you are aligned within a couple of inches of the opposite axle. If you build and align the wheel pants to plans, you will find when you sight through the axle that you will be looking at concrete instead of the other axle. This is bad. Seeing the other axle centered in the hole is good. Fix it, but don't get too anal about it, if you are within a couple of inches you should be a lot better off than you were. This is commonly referred to as the Gall Alignment. Do a search on it.
5. The Airheart go-cart brakes are plenty adequate, but the QAC mounts are crap. The LaRue brake mount is better, and the Coughlin mounts are better yet. 
6. Differential brakes are a great mod. It took me 1,000 hours to admit it. Some guys use toe brakes - I use finger brakes. Six of one, 1/2 dozen of the other. I like the finger brakes because they are easy to access and maintain. Mine are mounted just aft of the throttle. 
7. It's a very good thing to have a splitter in the rudder cables. That way, if the tail spring should break, you still have the rudder. Ditto the differential brakes. 
8. I think the aftermarket intermediate rudder cable bellcrank is unnecessary. 
9. The plane is FAST on the runway and requires your undivided attention to keep it on the centerline. This is not a Cessna 172.
Coughlin brake mount installed.

Coughlin Brake Mount

Rudder pedal splitter. One goes to the tail wheel and the one with the turnbuckle goes to the rudder horn.

Differential brakes and their respective master cylinders.


Tuesday, August 08, 2006

Another Oshkosh


Another year, another race.

The race went well, since I posted my fastest course time ever at 202.03 mph. Eric Whyte, the race's grand poobah, pointed out that since my speed was the same as my N number, I should consider changing my registry to N302SH, in advance of next year's race.

I was feeling pretty good when I showed up, until I found Klaus had entered. But, the first thing is to fly the course and land safely, then all else follows after that.

The plane flew well and the engine hummed along at 3,050 RPM. My oil temp never got above 190 and the cylinder temps stayed around 325, so my cooling system is working very well. Again, a full plenum and no oil cooler is all you need.


We had seven planes in the Sprint class, although nine had pre-registered. Though I took third place, I did manage to beat a Lancair 235, an RG Velocity and a Long-Eze. There was also a Glastar in our class, but he's not exactly what you would call competitive.

All told, there were 60 aircraft registered in the various classes and I managed to best 22 of them, including a whole mess of RVs.

Naturally, winning isn't everything, but it is fun to pass other planes on the course. I see my GPS recorded my max speed as 196 kts. - sure would have been nice to be my race speed.

So what next? Every year, after the race, I wander around Oshkosh and look for things I can do to pick up an extra knot or two. Actually the list is long:

* Prop extension to 8 inches, to better streamline the cowl.
* Straighten out the tail spring to fair better into the fuselage.
* Convert to exhaust augmentation.
* Smaller cooling nostrils.
* Replace 9:1 pistons with 10:1.
* Chop the oil sump down to fair better into the bottom of the canard.
* Make the air intake smaller.
* Remove the tail light fairing from the top of my vertical fin.
* Better fairing where the elevator meets the fuselage.
* Install a smaller carburetor, such as an Aero Carb, to allow me to
cut down the cowling.
* Higher tech prop.

But as I was flying home I thought "You know, a guy could buy a Q-200 virgin kit and cut the fuselage down the middle and make it a single seat Super Quickie (a Slickie?). Cut a foot, or so, off the wings, install an O-200 - then I'd give those guys a run for their money!

Anyway, it's all fun and there's nothing like building, flying and racing a plane you built yourself. Keep at it guys, the prize is on your horizon.
The other thing I wanted to mention, was that this year I picked up my "This Classic Homebuilt Has Been Flying for 20 Years" prop tag.

Here are the race results.

Friday, June 23, 2006

Cross Country in a Q-200

Just an update, Sandy & I got back, on Thursday, from our big trip out west. We had a family reunion in Sonoma, CA, so we loaded up the Quickie and flew out. And I do mean loaded. In addition to us, we had 30 pounds of baggage and an aux fuel tank with another 54 pounds of fuel. (31 gallons, total fuel capacity).

We made leisurely RON stops in Topeka, Ft. Collins, CO and Wendover, UT (won enough money at the casino to pay for fuel and lodging) and finally Santa Rosa’s Charles Schultz airport. Crossing the Rockies and the Sierras is quite interesting. I have done that before, but this time there was more weather and wind to contend with. A Garmin GPS 396 would have been very handy to have.

My mighty O-200 performed really well. The electronic ignition and high compression pistons are great to have at high altitudes. We had departure density altitudes as high as 7,400 feet. A reliable engine is always important, but when in the mountains, the price of poker really goes up.


Our plans kept changing. After the reunion we were going to try and spend a couple of days in Reno, but after all the family events we were just ready to beat feet home. We’re sorry we didn’t get a chance to hook with our Q-brethren on the west coast, but we just ran out of time and stamina.


We left Santa Rosa Tuesday around 8:30, but were stymied by clouds covering the tops of the first range of mountains. We landed at Sacramento Executive airport to get a closer check on the weather. I watched the weather all day because it looked like it might lift enough to make the hop across, then we hoped to at least do an overnight in Wendover Nevada/Utah. Since I am not a mountain pilot, I solicited the advice of a local flight instructor and he advised against trying it. Finally at 3:00 in the afternoon, we threw in the towel and got a room in Sacramento on Priceline.com.


Heading east on Wednesday, we made it from Sacramento to Ft. Collins, CO, with a single fuel stop, again at Wendover. Beautiful scenery. After Wendover the winds really kicked in and we had lots of moderate to heavy turbulence in and around the Rockies.


We put about 25 hours on the plane, and on the day we arrived in California we celebrated the 20th anniversary of the first flight of N202SH.

Adventure is the spice of life!