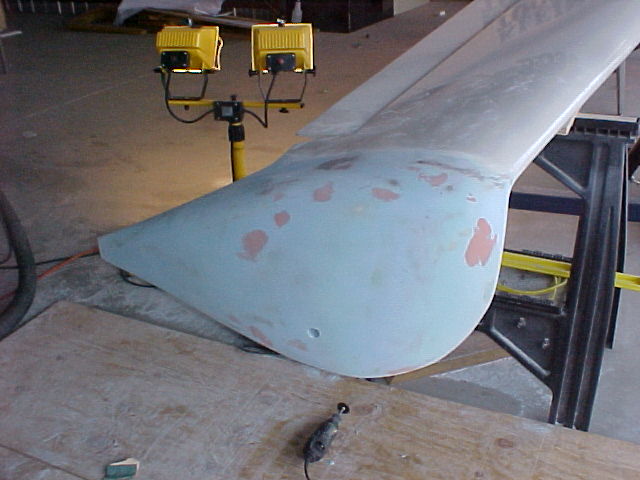
Sunday, March 27, 2005


Left brake cover. Posted by Hello

Left pant, using Aeropoxy Light. I hate sanding!!!!!! Posted by Hello

Right pant with the Superfill Epoxy Filler. Posted by Hello

My Pants

I can finally see light at the end of the tunnel! These wheel pants have taken a LOT longer than I had planned. Of course the weather, and life in general, can slow the progress. For the right pant I used the Super Fill epoxy filler. It goes on fine and is easy to work with.

I wanted to compare materials, so for the left pant I used AeroPoxy Light. It too, worked well. One comment about these premixed microballon fillers. I liked the Aeropoxy best for applying and filling, and it was a little cheaper than the Superfill. However, they are both a chore to mix! The first problem is, after time the epoxy can settle to the bottom of the can. The stuff is very thick and I broke a couple of paint mixing paddles trying to stir it up. I tried heating the stuff with a hair dryer and that helped a little.

Both materials were about the same to work with, however I thing the Aeropoxy Light was a little cheaper, and they included a little more material per quart kit.

One other note, I spoke, on the phone, with an Aeropoxy Light engineer and he said the unused product should be stored upside down, to bring any free resin toward the container's lid.

The filling process for the pants is pretty much complete, but since I have a whole wing yet to finish and install, I have not yet decided if I am goiing to buy more of the pre-mix filler , or to go ahead and make my own using epoxy.

Another thing that I am going to try different. Did you happen to see Cory Bird's beautiful yellow Symmetry at Oshkosh last year? That was the most perfect aircraft I have ever seen. In an article in Sportsmanpilot.com:

" Next came what Cory calls a resin wipe. After going over the surfaces with 36 grit sandpaper he spread on a coat of pure resin, then immediately began squeegeeing it all off. With a little time for cure between applications, this process was repeated five times, leaving just a film of resin maybe two or three thousandths thick, filling every 36 grit scratch and all the pin holes. That was followed by wet sanding with 150 grit, then a coat of DP-48 epoxy primer and a guide coat of some color - just enough to see when it is sanded off".

I'm going to try that method. Maybe I can squegee it on in 12 hour intervals. That should be enough to get the cure process to start, but not so hard that I would have to sand between coats.
Posted by Hello

Saturday, March 26, 2005


Here, the fillet is finished. I also have started the filling process, getting ready for paint. Posted by Hello

Wednesday, March 09, 2005


The fillet has now gotten one layer of BID and is now cured. I also peel-plied the edges, but that was removed before I took the photo. Posted by Hello

Most of the foam is now gone and just the little foam fillet remains. It may seem wasteful, all that effort and material for just a little fillet, but it really is the easiest and fastest way. Much better than using micro to glue in little styrofoam pieces. Posted by Hello

Carving and shaping continues... 90% of the foam winds up on the floor. Posted by Hello

Now, I have removed the outer film and started carving the foam. The remaining duct tape is defining the area I masked off. Posted by Hello

I have mixed and poured the foam and it has expanded. Be diligent to not disturb the foam while it cures. If you bump, move, or otherwise disturb it, you will break the little bubbles and create hard spots which will be more difficult to sand and shape. Posted by Hello

Here is how I did the canard-to-pant trailing fillet. First, I needed to build up the area with two part foam. Two-part foam is a miricle chemical! Be sure and get the good stuff - don't ever use the hardware store variety. In this photo I have used plastic film and duct tape to mask off the tunnel which will contain the foam. Posted by Hello

Tuesday, March 01, 2005


Trial fit of the new brake mount. Yes, one bolt is missing from the mounting bracket. You can also see the four nutplates used for the brake cover screws. Posted by Hello

The brake cover is now complete. You can also see the fillet, just above the cover. It was a challenge using pour-in foam with the canard right side up! I'm getting close to having this job done! Posted by Hello