This is a little note about keeping your building in perspective towards the object of actually getting in the air.
Way back in '82 when I first got my Q-2 kit I was thinking about all the neat things I could do with my plane. Mind you, it didn't look like a plane yet, just a bunch of parts, foam, glass, and bottles.
I went to a forum at Oshkosh given by a sharp NASA guy (I think his name was Don Hewlett) and he was demonstrating how to build an auto pilot using a stream of air blown across a couple of thermistors. The first year I saw him, he used a tiny motor to drive a tiny fan. In later years he used an audio speaker mounted in an empty beer can. The pulse of the oscillating speaker was to produce a puff of air across the thermistors. As the plane shifted position, the air stream would be deflected and one thermistor would be cooler than the other one. This differential would be used to drive the autopilot circuit. I thought this was very cool. He even passed out his plans.
I had a retired Bell Phone Labs engineer willing to help and he carefully milled the housing for the fan and the tiny fan blade. I bet he spent 20 hours on it. I bought all the other components and etched the circuit board.
Meanwhile, my plane was sitting in the garage not going anywhere. I was spending all this time on the autopilot project and wasn't actually building anything.
Fortunately, I somehow realized that spending time on an autopilot was getting me absolutely nowhere towards me getting in the air. I didn't have my priorities on straight.
Now, as I go into my 20th year of flying my Q-200, all of those autopilot parts are still in a box in the hangar. Maybe I can make it work someday - maybe not. But I do know that once I got my priorities straight I started making real progress.
And that is why we urge people to follow the plans, at least as closely as possible. Get it in the air first, then add the autopilot, tip tanks, canard flaps, winglets, retractable gear, or pulse detonation engine in your spare time.
Tuesday, January 31, 2006
Thursday, December 15, 2005
More TCM O-200 improvements
 I wish I took more photos of this engine. Here, you can see their extension for the oil sump. Interesting, eh?
Also, you want to look closely at the cylinder barrel fins. Notice that they are tapered. The tech rep told me that most of the cooling is done at the cylinder head and little heat transfer occurs at the barrel, so they removed cooling fin material to help lighten up the cylinders.
They also had a B&C starter installed.

O-200 oil presure sender
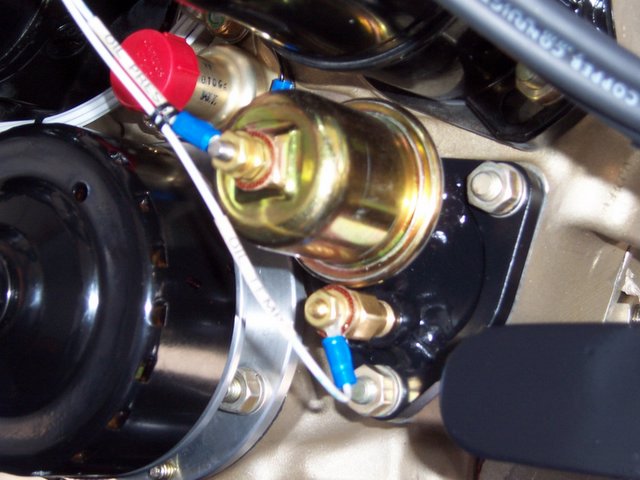 Here's a photo of the TCM display O-200 at last year's AirVenture. There are a couple of interesting changes that I was a little surprised to see.
 First, they installed an El Reno filter. Since they no longer needed the clunky oil screen they could now remove the oil screen housing.
They made a cover plate and welded in a couple of bosses so they could install the oil temp and the oil pressure probe. Next time I have my engine off I'm going to make a similar setup.
The red cap covers the tach drive and the round black thing is a B&C alternator.
Saturday, October 22, 2005
Baffling evolution
My Q-200 started out with the off-the-shelf baffling. It went through lots of changes which I don’t need to bore you with. I’ll try and keep it to the bottom line.
First – I don’t like oil coolers on the Q-200 installation. They are costly, heavy and are a possible failure point. In addition, they take up valuable cowling space, and when mounted on the firewall, make it that much harder to pull the engine for service.
So, the trick is to not have an oil cooler, but still keep the engine cool. Lighten and simplicate.
Enter the plenum. I saw plenum installations on two guys airplanes, Lynn French and Bruce Cranium and kind of liked the idea. My feeling was, though, that they weren’t getting all benefits available to them.
For that reason, when I decided to do the plenums, I chose to have it cover the crankcase split line. This way, cooling air will be forced over the crankcase and help cool the engine oil. I overhauled my engine a couple of years ago, and this was the logical time to make the new plenum baffling. The plenums were pretty easy to make. I just uploaded my plenum fabrication photos to my web log: http://samhoskins.blogspot.com/ so you can see how I did it.
The plenum really helped my engine cooling, and my oil temps dropped at least 20 degrees! I think I may have also picked up a knot or two. I did seem to have a high EGT on my #3 cylinder, which I chalked up to uneven fuel distribution.
I thought it was all better, but I met a guy named Sam James at Oshkosh. He makes cowlings for the RVs and he talked me into ordering a set of trick inlet rings. He said it would improve the cooling and maybe get me a little more speed. You can see his products here: http://www.jamesaircraft.com/ Notice that his plenums COVER THE ENTIRE CRANKCASE. His web site says about the full plenum cowl and rings: http://www.jamesaircraft.com/South_Shop.html He claims:
Average speed increase with the cowl and cooling plenum alone is 7-10 m.p.h.
“The increased speed is made possible through improved internal and external aerodynamic flow. This is accomplished in part by a slightly longer cowl which requires either a 4" prop extension or an extended hub propeller.
“The inlet design, influenced by NASA funded research conducted at Mississippi State, resulted in a 40% reduction in size while ensuring improved cooling in climb and cruise configurations.
“Overall drag is substantially reduced. Pressure loss in the upper chamber is negligible while cylinder head temperature variations are controlled uniformly to within a few degrees”.
Last spring I installed modified my cowling and installed the inlet rings. I didn’t notice any speed increase (rats!), but the engine is even cooler and now all of the cylinder temps are quite even. And you know what? That high EGT on #3 came down in line with the rest of my cylinders!
At this year’s AirVenture Cup race I ran around 1,000 feet AGL on a 90 degree day, wide open throttle, for two hours and twenty minutes. The oil temp never got over 210 degrees.
So, what works for me is: Full cover plenum baffling and no oil cooler!
Monday, October 10, 2005

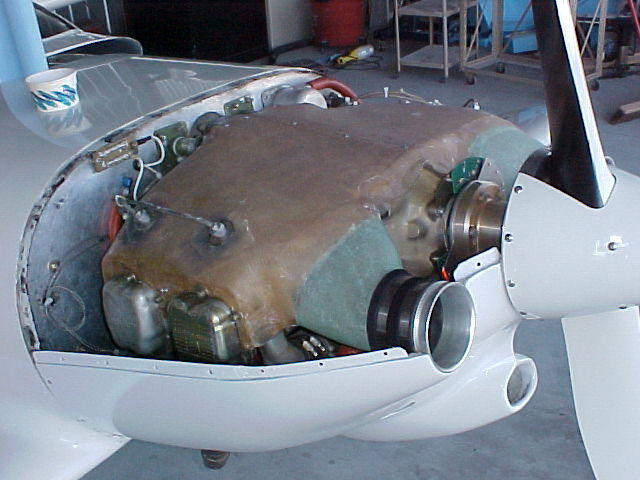
Fast forward two years. The next significent change came a couple of years later when I modified my cowling inlets to the Sam James' Aircraft Company inlets. They greatly improved my cooling and really evened out the temperatures.
This photo just shows the end result. For the "How to" look through some of my previous posts.


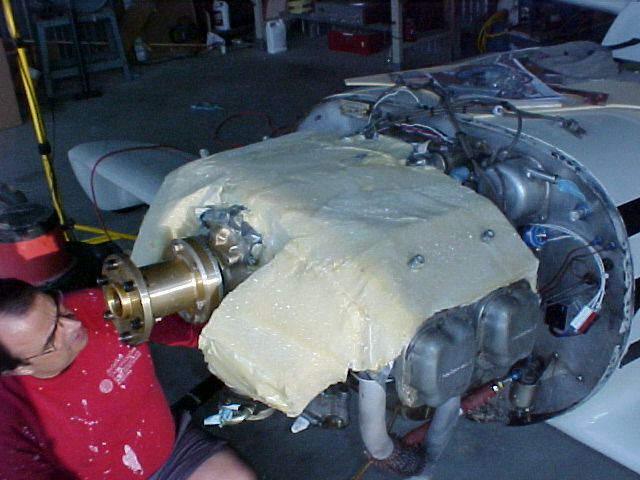
Glassed. I did leave out a step in my previous description. I made up a couple of flat pieces of glass to use around the rocker covers. When it came time to glass the plenum, I joined them to the rocker glass pieces. I spread some light grease over most of the foam, prior to glassing, as a mold release agent. Notice also that the plenum was laid up in two pieces. This affords me a split line. I used three BID and Aeropoxy for most of the plenum.
If I were to do it over, the only change I would make would be to fabricate alumimium plates to go around the rocker covers. I have had some minor crushing of the glass under some of the rocker cover screws and the alumimium would fix that problem.


O-200 Plenums and cooling
There has been a lot of discussion about plenum baffling on the Q-200 Engine group. I thought I'd post a few photos about how I made mine. It was really pretty easy.
Friday, August 12, 2005

Here's the payoff! My average speed for the 500 sm. mile race was 200.3 mph. Though my time was 3 mph faster last year, we had significantly stronger head winds this year. Rob Martinson, in his highly modified Vari-Eze, beat me by 7 mph. Four years ago he beat me by 20 mph, so I'm edging up on him. This race is A LOT of fun!
Saturday, July 09, 2005

Right after the successful test flight. Everything went smooth. I wound up the flight witha low approach down the runway and was looking at 220 mph on the airspeed indicator. Granted, I was in a shallow decent, but I didn't have the throttle all the way in, either. It took five weeks to modify the cowl.


Subscribe to:
Comments (Atom)