Here is the canard, ready for glass.

First batch of epoxy/microballoons goes on.

Lots of squeegees flopping around. Be sure and fill all those air holes guys.

Not that the micro is down on the foam, Clarke applies pure epoxy to the spar.

Fast-finger Larry wettin' everything out!


The layup gets a ply of UNI directional glass at a +45 degree angle, then another at a -45 degree angle. Finally, a spanwise layer is applied. That is what you see here.

Clarke is wetting out the glass over the spar. We are just about done and getting ready for the peel ply.

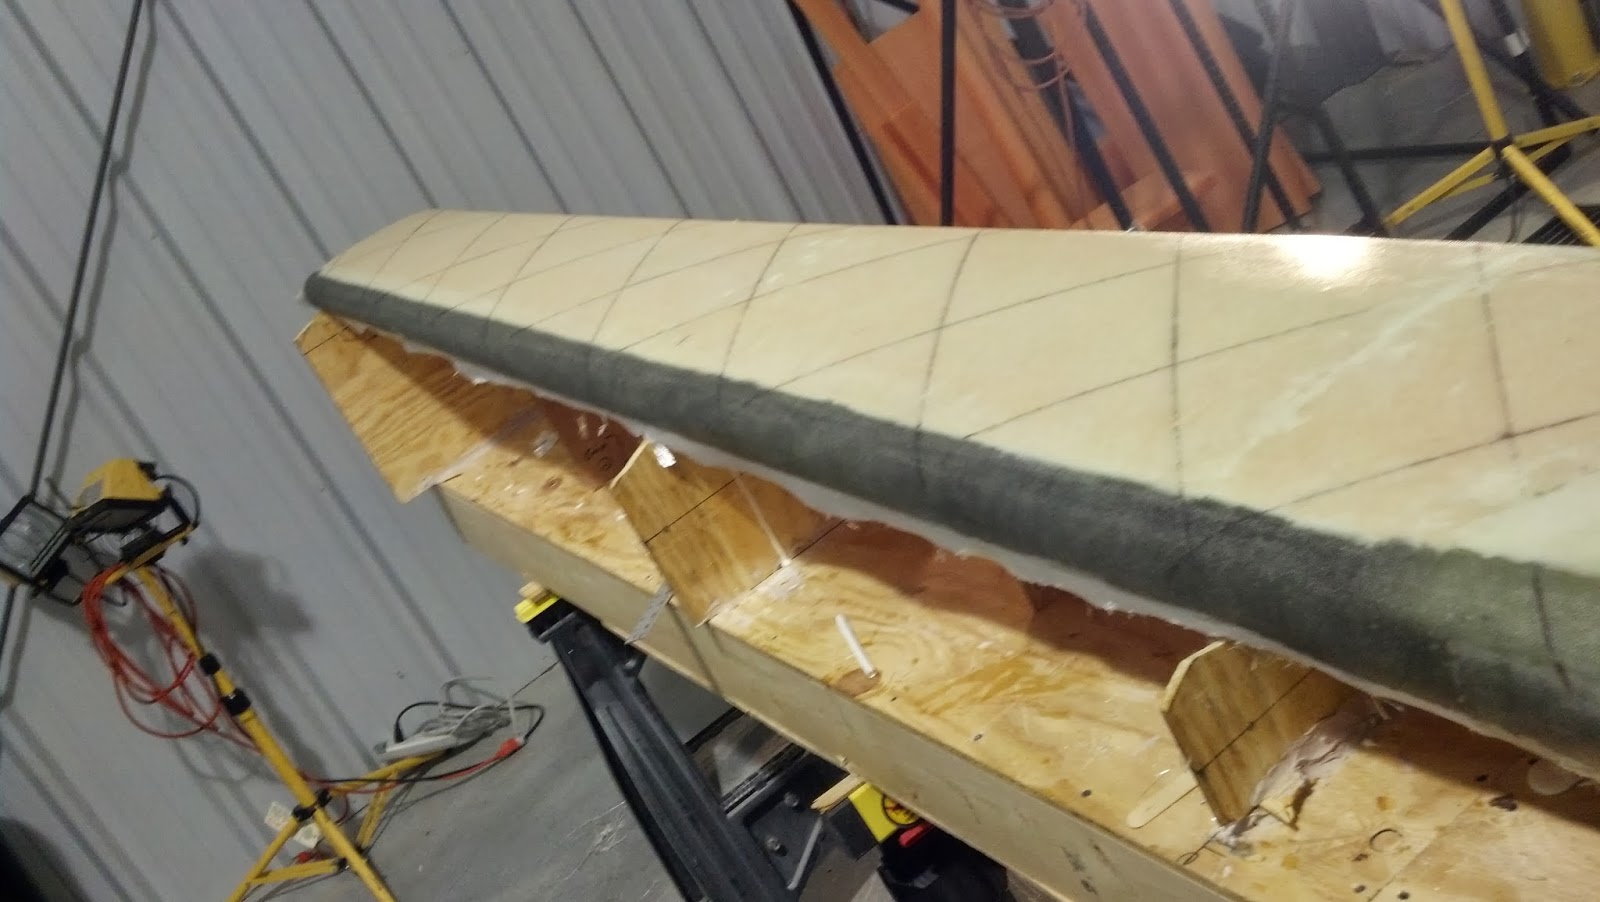
The glass layup is complete.
After all the glass is down, we apply a layer of dacron type fabric to everything. This flattens everything out and lessens future sanding when we have to prepare for joining more components and for the filler. Pat had a bunch of old Ceconite that he inherited from his father, and he donated it as peel ply.

I let it set for a couple of days to cure up and let everything harden. Pat came out and we removed a bit of the peel ply. Looks good!

As I said, I am really pleased with the results. Everything looks nice and straight. I guess I must have remembered some tricks from when I last did this 30+ years ago. Just seems like yesterday.
1 comment:
SWEET - Way to go Sam ! - Jeff Barnes
Post a Comment